Shoulder Pain Reaching Overhead: How to Rebuild Strength and Range After Rehab
The top shelf. The seatbelt. Washing your hair. After a shoulder injury, the everyday overhead reach becomes a small audition you would rather not perform.
Reaching overhead is the height you are trying to reclaim, and you reclaim it the way you would climb back to any height, in stages rather than in one leap. This guide lays out those stages as general fitness education to use alongside the provider who knows your shoulder.

Reaching overhead still hurts after rehab for a reason
Overhead is the most demanding place your shoulder goes, so it is the last position to feel trustworthy again. A shoulder can be comfortable at your side and still complain the moment your arm climbs past your head.
What overhead reaching asks of the shoulder
The shoulder is the most mobile joint in the body, and that mobility depends on a small crew of muscles, the rotator cuff, keeping the ball centered as you lift. Raising your arm overhead narrows the space those tendons pass through, and if the cuff is weak or the timing is off, the tendons can get pinched against the bone above them. That pinch is what you feel near the top of the reach.
So overhead pain is rarely about the destination and usually about the journey: how well the shoulder organizes itself on the way up. Fix the organizing, and the height tends to open back up. In practice that means the goal is not to force your arm higher but to make the climb smoother, and the height tends to follow the smoothness.
Rehab restores comfort but not full capacity
Rehab is built to calm symptoms and restore safe, basic motion, and it does that well. It usually ends when your arm moves without pain through everyday ranges of motion, not when you can load that arm overhead with confidence. That leaves a gap between a shoulder that no longer hurts and a shoulder that can carry a full grocery bag to the top shelf, and the gap is normal. Discharge is the floor of recovery, not the ceiling, and this plan is about everything above that floor.
'Rebuild strength and range' means training both together
Range is how far the arm can travel; strength is how well it can produce and control force once it gets there. Both have to come back, and in roughly that order, because strength built on a restricted, painful range only reinforces the restriction.
The plan moves through four stages, each one earning the next:
Win back the range. Restore comfortable, controllable overhead motion.
Build the base. Strengthen the cuff, shoulder blade, and upper back.
Add load to the reach. Take that strength overhead, gradually.
Take it back overhead. Return to real lifting, carrying, and reaching.
Before you start: a quick readiness check
A short, honest check tells you where to begin without provoking the shoulder. You are gathering information, not testing your limit.
Reading your shoulder's signals
Try a few slow, gentle arm raises within a comfortable range and read what the shoulder reports, the same symptom-guided approach physical therapy uses:
Keep going: mild effort, a shoulder that feels stable, and any discomfort fading soon after you stop.
Ease in: a little catching, a sense of weakness, or fatigue that arrives fast, all of which mean start smaller.
Stop for now: sharp pain, a feeling of instability, swelling, or symptoms that climb as you move, which call for a pause and a check-in rather than a push.
Check with your provider first if these apply
If the shoulder is sharply painful, feels unstable, swells, or wakes you at night, talk to your provider before loading it overhead. Lost confidence and stiffness are things you can train through; instability, significant night pain, and swelling deserve professional eyes first. Asking is not a setback; it is what lets you train the rest without worry.
Stage one: win back the range
Before strength, you need somewhere to put it. The first job is restoring comfortable, controllable motion so the shoulder can reach overhead without pinching.
Gentle range and mobility basics
Start with easy, pain-free movement that coaxes the shoulder through its range rather than forcing it:
Pendulums: let the arm hang and circle gently.
Supported reaches: use the other hand or a surface to assist.
Gentle assisted raises within a comfortable arc.
Stay under the level that provokes a sharp pinch, and let the comfortable range expand a little at a time. The goal is smooth, unhurried motion, not maximum height on day one.
Scapular control and setup
Your shoulder blade is the platform the whole reach launches from, and a platform that drifts makes the reach feel unsafe. Practice setting the shoulder blade gently down and back before you lift, so the arm climbs from a stable base; scapular-focused training measurably improves pain and function in shoulders like this. This small habit changes how the top of the reach feels more than almost anything else. Try it once both ways: reach with the shoulder hiked toward your ear, then reach again after gently setting the blade down and back, and feel how much more room the second version finds.
Stage one is working when the range comes back
You are ready to move on when you can raise your arm through a useful range with control and without a sharp pinch, and when your shoulder stays quiet the next day. You do not need full, perfect range to progress, just a comfortable, controllable one you can start to load.
Stage two: build the base
With room to work, you build the muscles that stabilize and move the shoulder. Strengthening the supporting muscles keeps the joint stable, relieves pain, and protects against re-injury.
Rotator cuff and scapular strength beyond bands
Begin with
controlled rotator cuff work and shoulder-blade strengthening, then progress past the lightest bands as it gets easy. The cuff keeps the ball centered, and the shoulder blade gives it a stable base, so both deserve real, progressive attention rather than the same featherweight band forever. A good sign you are ready to add a little load is when the lightest band feels like nothing and your control stays clean through the whole set. Clean control comes first, then gradual load.
Pressing and pulling balance
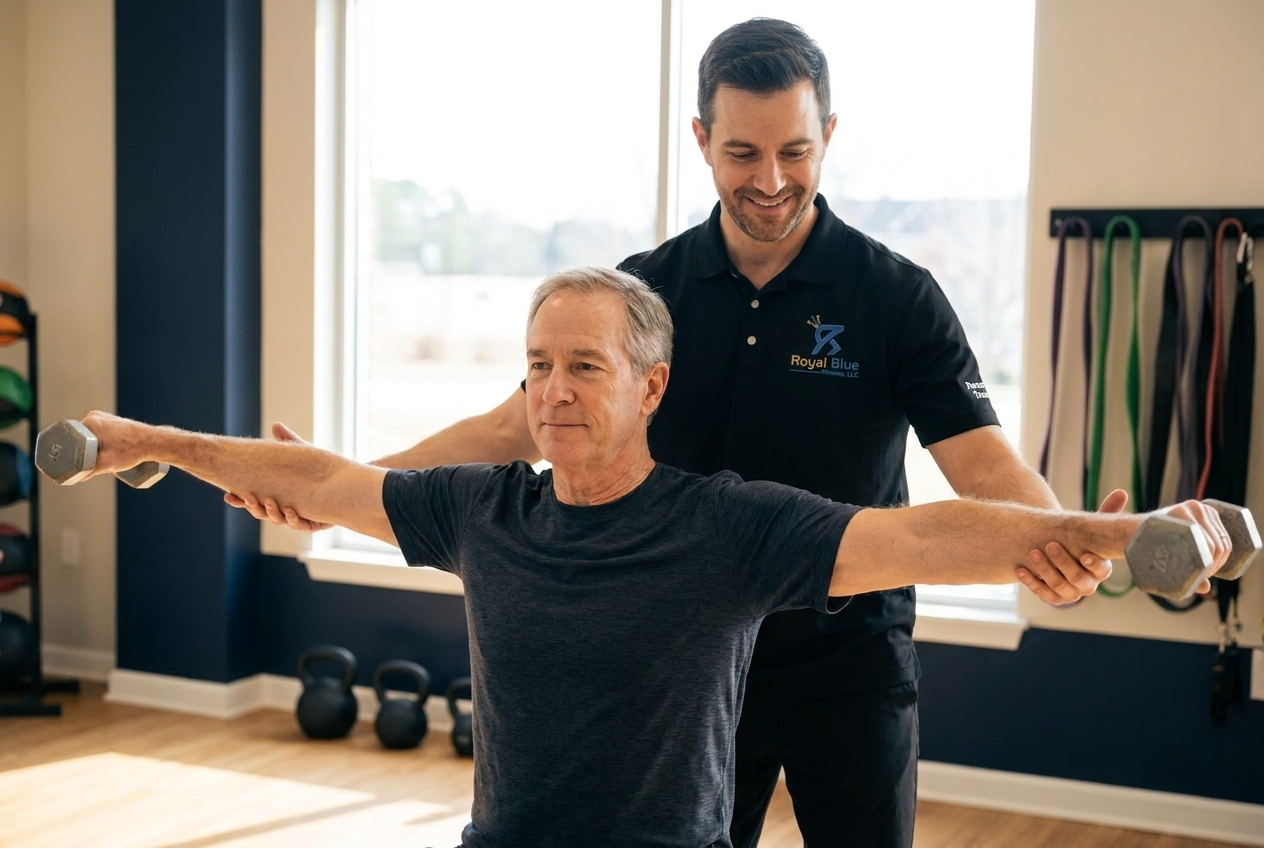
A healthy shoulder pulls as much as it presses, and rebuilding usually means more pulling than people expect. Rows and other pulling patterns build the upper-back support that lets the shoulder press overhead safely, so balance the two rather than chasing presses alone. Strong pulling is quiet insurance for the overhead reach. A simple ratio to keep in mind early on is at least as much pulling as pressing, and often more, while the shoulder is rebuilding.
Dosage to start
Begin with manageable resistance and higher control, a couple of sessions a week, and progress only as the shoulder stays comfortable the next day. You are building a base, not testing a max, so err toward slightly too easy at first. Consistency at a friendly dose beats the occasional ambitious session your shoulder pays for.
Stage three: add load to the reach
Now you take the strength you built and bring it overhead, gradually and on your terms. This is where comfortable motion becomes genuine overhead capacity.
From partial range to full-range pressing
Start pressing within a partial overhead range you can own, then extend the range as it stays comfortable. A landmine press or a partial dumbbell press lets you train the overhead pattern without demanding full, loaded elevation before you are ready. Add height to the press the way you added range earlier: a little at a time. Each new inch of comfortable overhead range is a small win worth banking before you reach for the next one.
Adding load and control
As the pattern feels solid, add load in small increments while keeping the movement controlled and the shoulder blade set. Adding load progressively is what reliably builds strength, so let the increases stay small rather than leaping. Let control, not ego, set the weight. The shoulder you can press cleanly today is the one that earns more weight next month; the one you muscle through tends to cost you a week.
Hold and regression points
If a session brings back the pinch or leaves the shoulder grumpy the next day, hold at the last comfortable level for a few sessions, or step back a notch. A regression is not a failure; it is the shoulder telling you the last jump was a touch too big. Drop back, rebuild from steady ground, and climb again. The climb back from a small regression is almost always faster than the original ascent, because the strength has not vanished; it just needs a gentler on-ramp.
Stage four: take it back overhead
The final stage returns the reach to the place it started: ordinary life, where you lift, carry, and reach overhead without a second thought.
Reaching, lifting, and carrying overhead
Practice the real tasks deliberately: placing something on a high shelf, lifting a bag into an overhead bin, carrying a load with the arm raised. Rehearsing the actual demands, at a weight you control, is what turns gym strength into trustworthy daily function. Start light and build, just as you did everywhere else.
Maintaining range and strength
Once the reach feels reliable, a little ongoing work keeps it that way. A short, regular dose of cuff, scapular, and overhead pressing work maintains the range and strength you fought for. Shoulders lose ground quietly when training stops, so keep a maintenance habit rather than declaring victory and walking away. Even one short session a week is usually enough to hold the height you reclaimed.
When the reach stalls, adjust the approach
Progress overhead is rarely a straight climb, so expect the occasional stall and know how to read it.
If pinching returns
A returning pinch usually means you added range or load faster than the shoulder was ready for, not that you caused harm. Ease the range or the weight, recheck that your shoulder blade is set before you lift, and rebuild from the last comfortable point. If the pinch is sharp or persistent, that is a reason to check in with your provider.
If one side lags behind
It is common for the rehabbed shoulder to trail the other, and the answer is to give it dedicated work rather than letting the strong side carry the load. Train the lagging side on its own, lead with it on some sets, and let it set the pace until the gap closes. Symmetry comes back with focused attention. The simplest tell is a side-by-side comparison: run a set with the strong arm, then the rehabbed one, and notice where the weaker side wants to shrug up or swing the weight instead of pressing it cleanly. That cheat is easy to feel once you go looking for it.
How long overhead confidence usually takes
There is no universal timeline, but many people feel meaningful change within a few weeks of consistent, staged work, with greater confidence in the overhead over a couple of months. The path is rarely straight, and a flat week or a small step back is part of the process rather than something to work against. Watch the trend: if your reach is gradually getting easier, the plan is working.
Coaching is the better next step when the reach stays stuck
Some shoulders rebuild overhead confidence on a careful home plan, and some stall, plateau, or keep pinching no matter how patient you are. If that is you, or you would simply rather not guess your way up the stages, a coach can watch how you move and build the progression around your shoulder.
Royal Blue Fitness bridges that gap from rehab to a strong, reliable overhead reach, starting with a Strength and Range of Motion Assessment and working in coordination with your providers.
Book your assessment when you are ready to climb. The goal is simple: to make the top shelf forgettable again.
Frequently Asked Questions
Why does my shoulder pinch when I reach overhead?
Raising your arm narrows the space the rotator cuff tendons pass through, and if the cuff is weak or the shoulder blade is not setting properly, those tendons can get pinched against the bone above. That is why the pain shows up near the top of the reach rather than at your side. Building cuff and scapular strength and control usually opens that space back up, which is exactly what the staged plan above is built to do.
Should I push through overhead pain?
Mild discomfort that settles quickly is usually safe to work near, but sharp pain, a pinch that lingers, instability, or swelling are signals to back off rather than push. Pain near the top of the reach is information about your current limit, not an obstacle to bulldoze. When in doubt, reduce the range or load and check how the shoulder feels the next day.
Which exercises rebuild overhead strength?
Start with rotator cuff and shoulder-blade strengthening to stabilize the joint, add pulling work like rows to balance the shoulder, then progress to partial and full-range overhead pressing as comfort allows. The sequence matters more than any single move: control and range first, then load. Choose the specific exercises your provider has cleared and build them gradually. If you only have time for the essentials, prioritize scapular setup and cuff control, since they make every movement above them feel safer.
How long until I can press overhead again?
Many people return to comfortable overhead pressing within a couple of months of consistent, staged work, though it depends on your starting point and history. Rushing straight to loaded pressing is the most common way to reignite the pinch, so let range and base strength come first. Treat the timeline as a direction, and let your next-day response guide how fast you climb. A short weekly note on how the overhead reach felt turns a vague timeline into visible progress.
Is overhead pressing bad for shoulders?
Not inherently. For a prepared shoulder, overhead pressing is a valuable, healthy pattern that builds the exact strength daily life demands. It becomes a problem mainly when it is loaded before the shoulder has the range, control, and base strength to handle it. Earn the overhead position in stages, and pressing becomes training rather than a trigger.
Here are our latest articles! Click to read more.